
Monitoring the same location over a period of days, months, or years is a great way to track change over time for organisms, land use and more. And it’s part of the protocols for many citizen science research projects. Here’s a step-by-step tutorial for how to add locations for predefined sampling sites to an existing datasheet on CitSci.org. This tutorial is most useful for managers and those with project editing access.
What’s a predefined sampling site?
Predefined sampling sites allow volunteers to submit observations at the same location over and over again. They differ from opportunistic observations where volunteers make observations wherever they happen to be when they observe something. Both types of observations have their merits and which one you choose will depend on the scientific needs for your project. For example, StreamTracker includes two different datasheet options in their project, one for opportunistic locations and one for predefined locations and volunteers can choose either one. This allows StreamTracker researchers to use both types of data to answer different scientific questions.
Why use predefined sampling sites?
There are a number of advantages to adding predefined sampling sites to a project as opposed to participants taking observations at happen-stance locations. Predefined locations allow you to easily track change over time in a specific place. Consistent locations can also make statistical analysis and trends/patterns easier to analyze and more straightforward. Then, there’s the obvious – predefined locations make it so much easier for your volunteers to know they are in the right location to do their monitoring!
If any of this sounds useful to you, read on to learn how to add predefined sites to your CitSci.org project.
How to add predefined sampling sites to your existing datasheet
STEP 1: Login to your CitSci.org account and navigate to your project homepage.
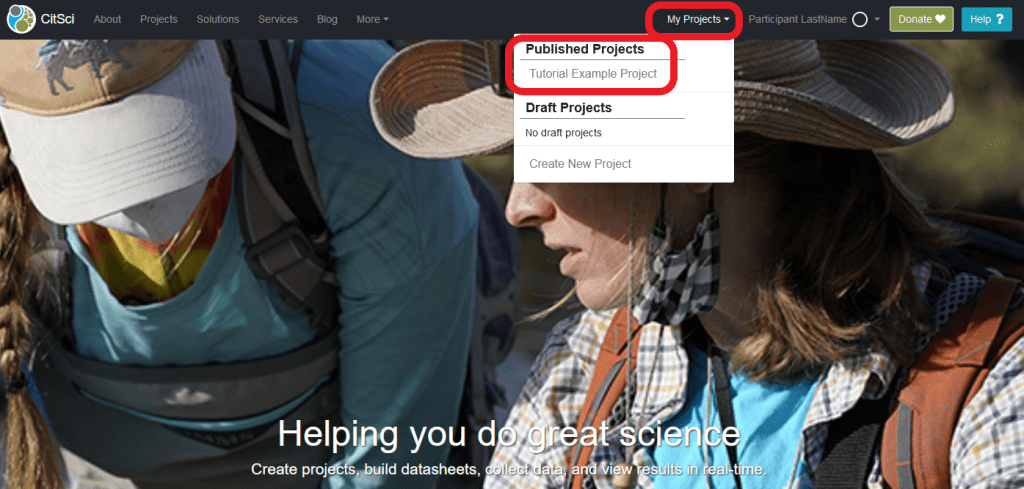
ProTip: If you are new to CitSci.org, you may want to read our tutorial explaining how to login to your account, set up a project, and begin navigating the tools in your dashboard.
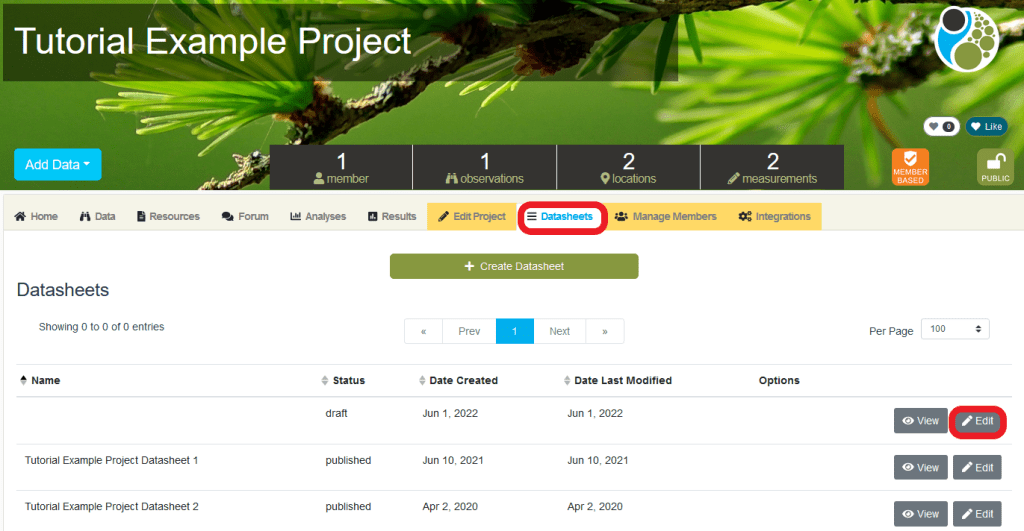
STEP 2: Navigate to the datasheet you want to use.
From your project homepage, click on the yellow “Datasheets” tab. Select the datasheet you want to change from your list and click “Edit” and you will be directed to the Datasheet Creator screen.
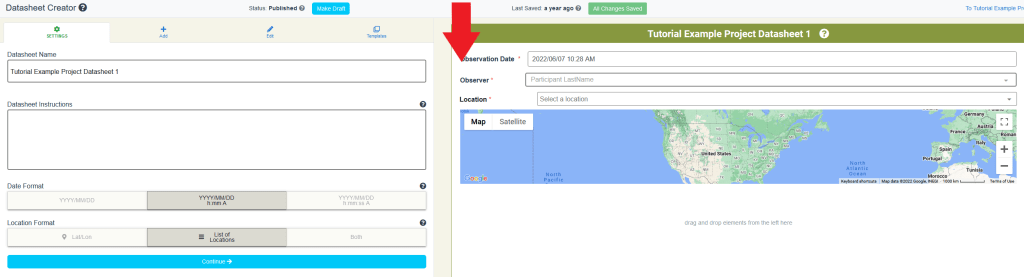
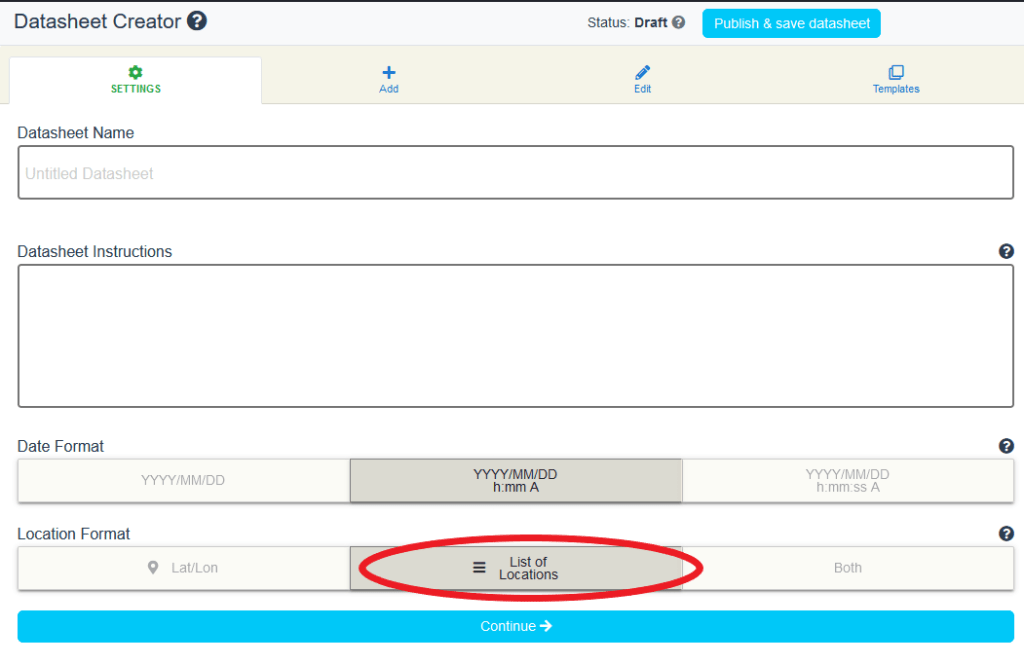
STEP 3: In the “Location Format” section, select the “List of Locations” button.
Step 4: Navigate to the “Location Format” section.
This will bring you to the “Create a List of Locations” popup screen where you can create a new location by inputting the location name, latitude and longitude. Alternatively, you can add an existing location to your datasheet by choosing from the dropdown list.
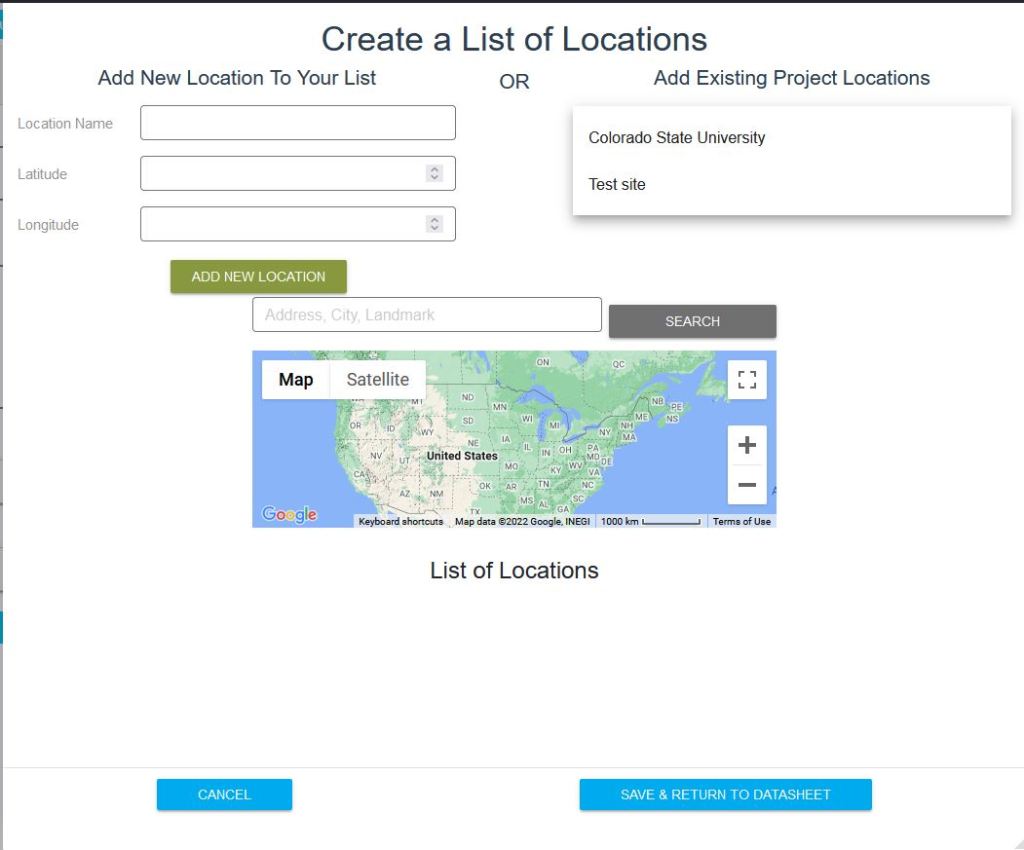
ProTip: Check the list of existing locations in your datasheet before you create a new one. The system will check for duplicate locations and report an error if you accidentally try to add the same predefined location to your list twice.
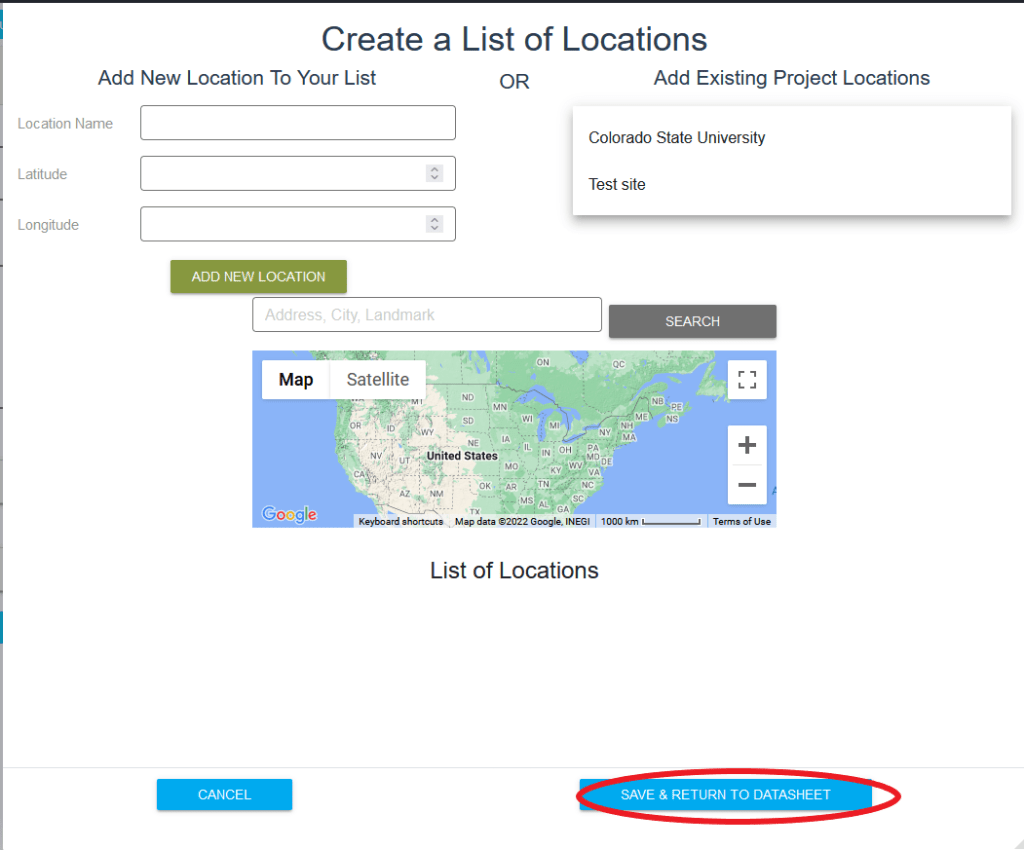
STEP 5: Use the blue “Save and Return to Datasheet” button to preview your datasheet.
Toggle between editing view and preview as many times as you need. Changes will be saved as you go. Once you are satisfied with your changes, you are ready to save and exit. NOTE: THIS STEP DOES NOT SAVE YOUR LOCATION.
STEP 6: Click “Publish and Save Datasheet”.
You will now be oriented back to your Project Profile. This step ensures that your participants can view your new location and updated Datasheet.
ProTip: Contact our team for assistance creating awesome datasheets to satisfy the goals of your project.
And that is how you add locations for predefined sampling sites to an EXISTING datasheet. Check out other tutorials for tips on how to make the most of your CitSci.org account.
How to Create Your Citizen Science Project on CitSci.org in 5 Easy Steps
How to Add Locations for Predefined Sampling Sites to a NEW Datasheet

2 comments on “How to Add Locations for Predefined Sampling Sites to an EXISTING Datasheet”