As a project manager, you can edit your CitSci projects and manage the members, contributions and participation in these projects. In this tutorial, we will navigate the tools available to project managers and discuss how to use them.
STEP 1: Create a Project
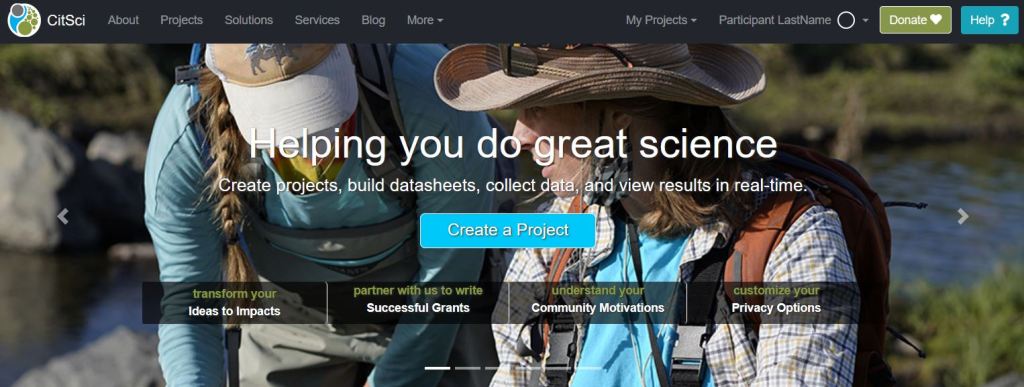
First, create a new project on CitSci! Go to citsci.org. On the home page, you’ll see a bright blue button in the center of the screen that says “Create a Project”. Click on that button to start the project creation process. For the purposes of this article, we assume you’ve already created a project but in case you haven’t, jump over to our blog How to Create Your Citizen Science Project on CitSci.org in 5 Easy Steps for details about the project creation process. Then revisit this article to dive into editing your project profile.
STEP 2: Navigate to your Project Profile
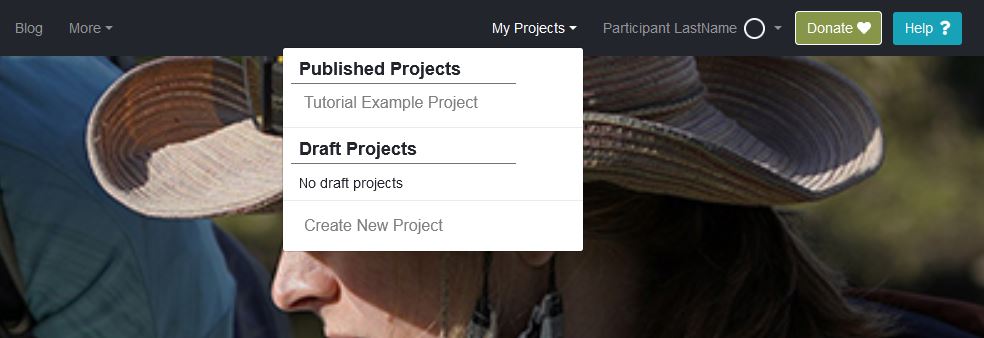
As a project manager logged in to CitSci, you should see a menu option next to your username on the CitSci website called My Projects. Under this tab, click on the project you want to view and edit.
ProTip: If you are not a project manager and want to view the projects you are participating in, you can find them on your My Profile page.
STEP 3: Edit your Project Profile
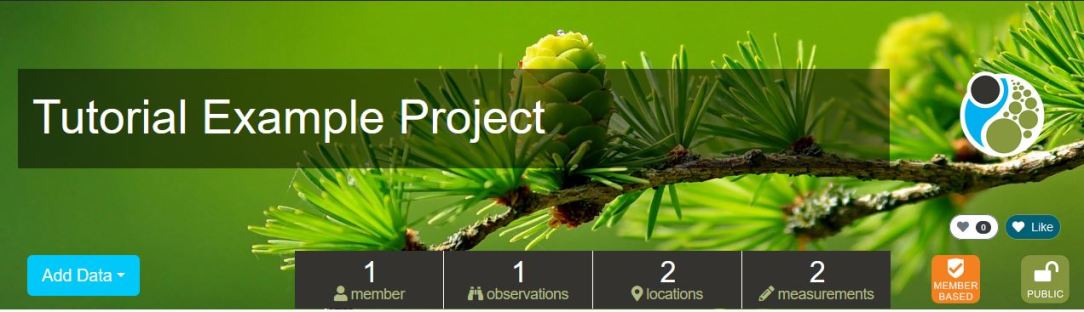
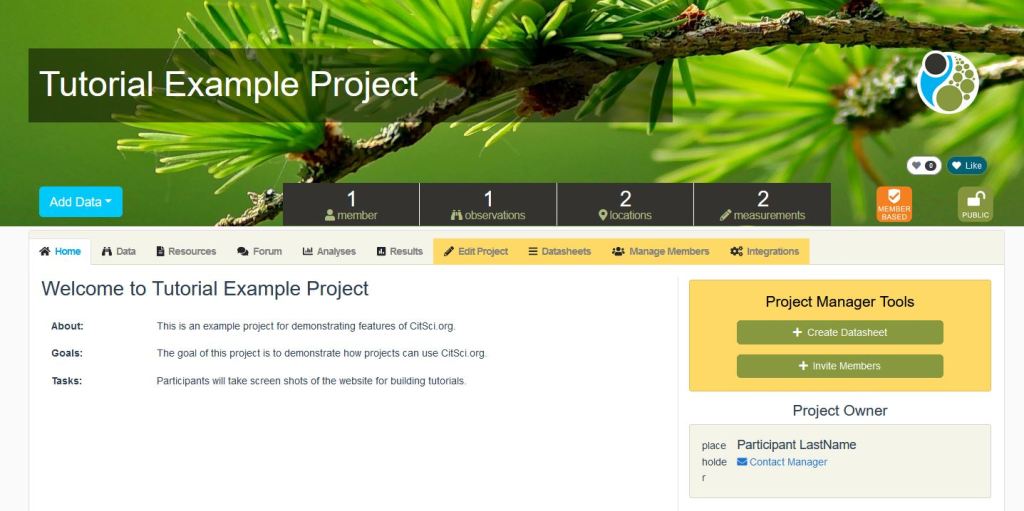
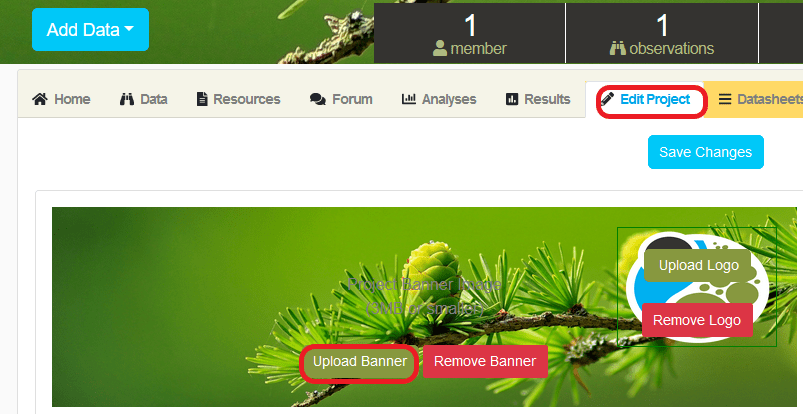
When you first see your Project Profile, you should see an Add Data button, stats about your project, and icons showing whether your project is member-based (or not) and whether it’s public or private. Below the stats, you’ll see a set of with the following options: Home, Data, Resources, Analyses, Results (these are tabs everyone can view if your project is public). You’ll also see four tabs in yellow that only appear for project managers: Edit Project, Datasheets, Manage Members, and Integrations.
Adding a Banner Image
Before you do anything else, help your project look it’s best online by adding a banner image and a badge or logo to represent your organization on the Projects Page. Click on the yellow Edit Project tab. Near the top left, you’ll see a green button that says “Upload Banner”. Click on the Upload Banner and select an image from your computer that is 3MB or smaller.
The Browse File Dialog box will show a crop frame. Center your picture within the crop frame and click on the blue Crop Image button.
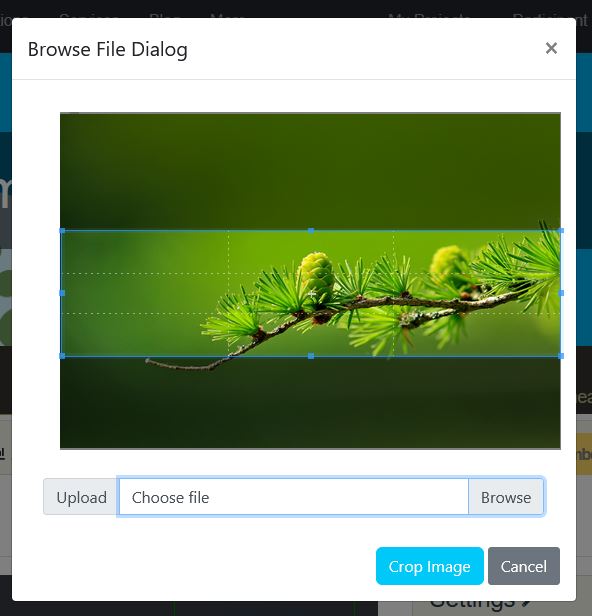
Then click the blue Save button that appears once the image loads. Finally, click the Save Changes (the blue button above the Project Banner image box).

Adding a Logo or Badge
Next, add a logo or badge that will overlay on your banner image. This is a smaller, square image, that will represent your project around the website, such as on the Projects list page. Click the green Upload Logo button and choose a photo from your computer files. The Browse File Dialog box will show a crop frame. Center your picture within the crop frame and click on the blue Crop Image button. Then click the blue Save button that appears once the image loads. Finally, click the Save Changes (the blue button above the Project Banner image box).
If you decide you want to change the logo, you can either upload a new one or click on the red Remove Logo button.
Describe your Project
Below the Banner Image you uploaded in the above steps, you’ll find several fields for describing your project to the world.
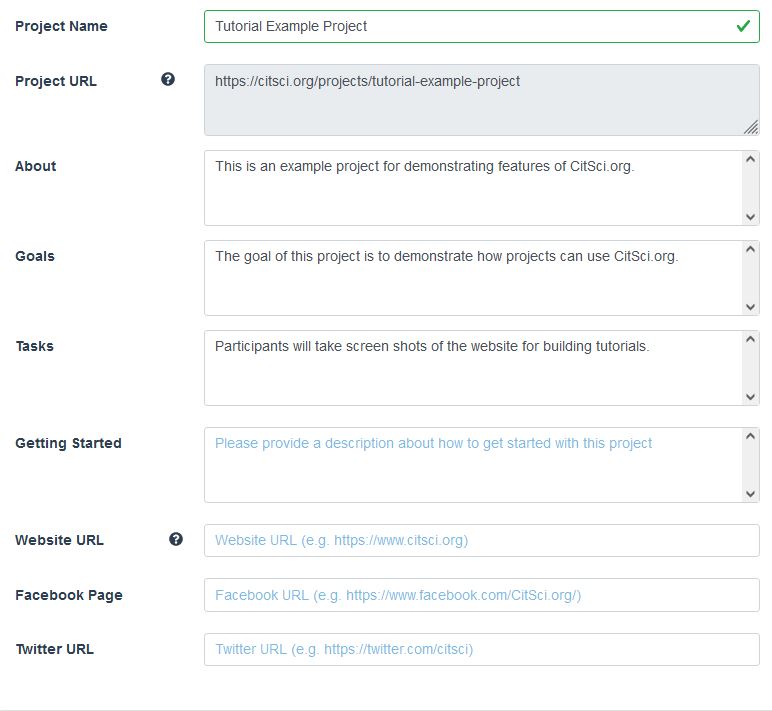
Project Name
Your Project Name should be descriptive enough for people to understand what you are about. Stream Tracker, for example, is a project about tracking streamflow, the Virginia Amphibian Monitoring Project is about monitoring amphibians in Virginia – you get the idea.
Project URL
In the Project URL field, put a link to your organization’s website. If you don’t have another website to point to, just leave this field blank.
About
Provide a description of your project so people visiting your Project Profile page will understand what you are all about. The Bird Conservancy of the Rockies has a great example of a project description:
“Bird Conservancy of the Rockies Bald Eagle Watch program was started in 1988 to monitor and help protect the Bald Eagle nest at Barr Lake State Park northeast of Denver. Now, citizen scientists with the Bird Conservancy monitor eagle nests across the Front Range to provide information to biologists on the nesting success of the Colorado population.”
Goals
The Goals section is an opportunity to lay out what your project wants to accomplish through this project. Because it’s so important to the success of a citizen science project to have clearly defined goals, this is a required field. Here’s an example of a simple, yet descriptive goal from the Lowcountry Algal Monitoring Program for Students project:
“Quantify the abundance of seaweed within permanent plots in Charleston Harbor.”
Tasks
Define high-level tasks your participants will complete as part of this project. The tasks for the Lake Cascade Idaho project make it clear this project is about water monitoring:
“Make lake water and harmful algae bloom observations, collect limited water water physical and chemistry, photograph blooms, public for awareness and remedial actions. All data is provisional. Not regulatory sampling. Since 2018, our volunteers have been a strong voice for clean water. Through educational programs and collaboration with local-state-federal agencies, we help people understand the North Fork Payette River Watershed problems and the scientific solutions needed to reduce nutrient pollution contributions that feed cyanobacteria.”
Getting Started
If you’ve created a citizen science project, you probably want at least a few people to sign up for it, right? The Get Started section is a great place to engage with prospective volunteers and tell them anything they need to know to sign up for the project. Do they need to attend a training workshop or fill out a special form? Should they be comfortable wading in streams? Or able to leap tall buildings in a single bound? Here’s where you let them know!
Website URL
This one’s probably self explanatory. If your organization has a separate website, here’s where you add a link to it.
Facebook Page
If your organization has a Facebook page, here’s where you add a link to it.
Twitter URL
If your organization has a Twitter account, here’s where you add a link to it.
Location
Use the map or the latitude/longitude fields to share the location of your project. If your project spans a large area, add the location of your organization’s headquarters.
STEP 4: Settings Management
In the right hand column of the Project Profile page you can manage various settings for your project including membership, privacy, and integrations with 3rd party platforms such as SciStarter and the Zooniverse, and assign Affiliate Organizations (if applicable).
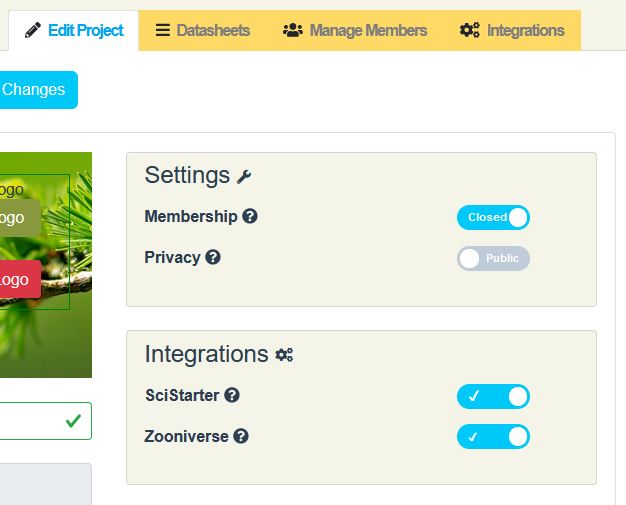
Membership Settings
All citizen science projects go through an important decision making process early on to decide how open or closed their project membership and their data will be. We’ve written a whole paper on what some of those decision making processes look like – and a summary, in table form, is available in the graphic below. In the Membership section, toggle your settings to match the needs of your project.
Open membership
Anyone can join the project without your approval (great for large events like bioblitzes or crowdsourcing where you don’t need to know everyone individually).
Closed membership
When potential participants click on the button to join your project, you (and any other project managers you have listed) will receive an email with the request that you will need to approve in order for them to join. This option can be helpful for projects that require special training before participating.
Project Data Privacy
Another important decision to make is whether or not the data your project participants collect should be open or private. This is a project-level decision that all managers (and their teams) generally work through early in the project. You may be collecting scientific data about water quality or conducting a bioblitz of a public space, in which case sharing the data you collect publicly is probably in the best interest of the project because it can be shared easily with a large audience of participants and even non-participants. Or, you may be working on a research study that requires collecting data about a sensitive or protected species, in which case it may be best to keep the locations of those species private.
The CitSci team is part of many discussions about data management in citizen science. We encourage you to make your data open whenever possible to help further access to open scientific data. However, we also fully support the need for private data as well. Use the toggle in the Settings box to choose the approach best for your project.
Public (data)
Your project data are visible to everyone.
Private (data)
Your project data are only visible to members of your project.
Integrations
SciStarter
Turn the SciStarter toggle on to link your project’s profile information with SciStarter. SciStarter is a great place for people to find, join, and contribute to science through more than 1,600 formal and informal research projects and events. Their database of citizen science projects enables your project to be discovered by even more people. We integrate with SciStarter for project sharing and event tracking. (The full integration with SciStarter is currently undergoing upgrades and will be available soon).
Zooniverse
If your Connect your project project requires image processing, you may want to consider integrating it with the Zooniverse. (Not sure what we’re talking about? Check out this example with the Mountain Goat Molt Project.) The Zooniverse is a platform for people to contribute to science by classifying subjects (images, recordings, etc.). Their platform enables crowdsourced participation in large crowdsourced citizen science. We integrate with the Zooniverse to make it easy for you to share your project photos for subsequent classification by Zooniverse volunteers. Talk to us if you are interested in using this feature and we can provide further guidance for how to use this integration effectively.

2 comments on “How to create and edit a project profile on CitSci”